What do you use spreadsheets for?
If you're anything like me, you likely use them to collect data, track campaign or blog post analytics, or keep track of weekly assignments.
But have you ever thought about using spreadsheets to make a calendar?
And, more specifically, have you ever thought about using Google Sheets to make a functional calendar?

If you often work on campaigns for a few different clients, creating individual calendars in Google Sheets could be uniquely useful for ensuring the client understands when certain content will go live. Alternatively, perhaps you need to create an internal Google Sheet calendar for your team to keep track of upcoming projects.
Making a calendar in a tool that's commonly used for spreadsheets sounds a little intimidating, but don't worry, the process is actually pretty intuitive. And with the help of some tips, you can easily make a functional calendar that you can sync your schedule with.
Below, we'll go over how to make a calendar in Google Sheets and include some tips that'll help you elevate the design. At the end, your calendar will look something like this:
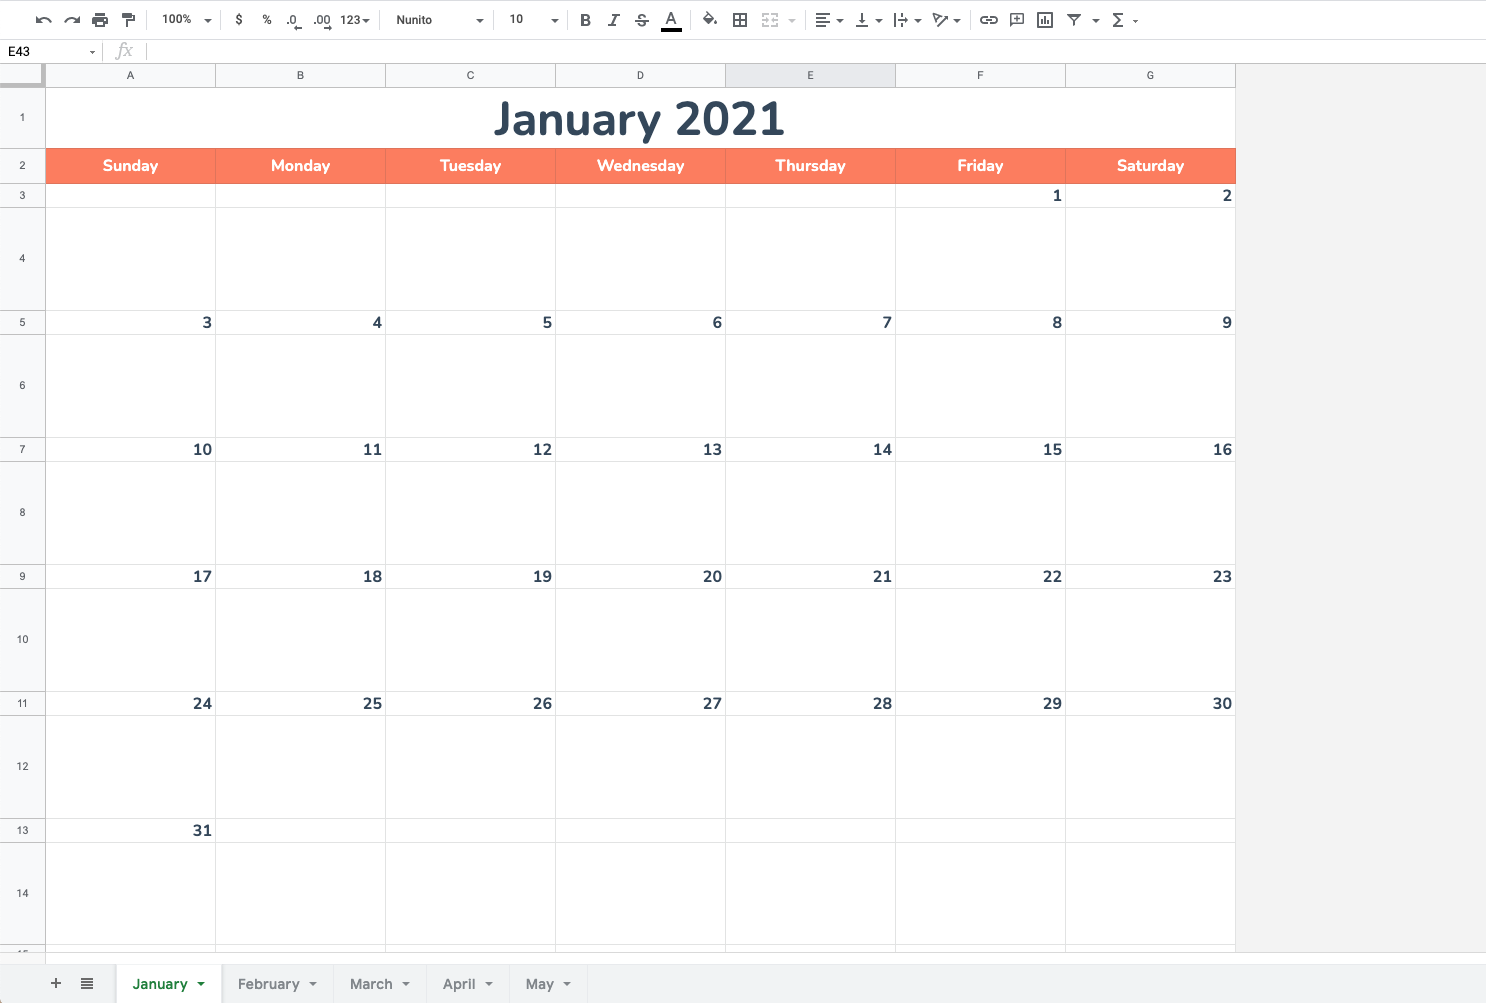
So start a new spreadsheet and get ready to create your very own calendar. 📅
1. Open a new spreadsheet and choose your month.
First, open a new spreadsheet. Then, delete columns H — Z. They won't be needed.
Then, choose your month. For this example, I decided to do January 2021, so I filled that into the first cell. What's great about Google Sheets is that it automatically recognizes dates, so typing in a month, followed by the year in YYYY format will tell Google that you're going to be working with dates.
2. Begin to format your calendar.
Next, format your calendar. I selected the text, January 2021, in Column A, Row 1. I highlighted seven columns (A-G), and clicked Merge to make that cell span across the entire column. You can find this button to the right of the Fill tool.
Here, I also center-aligned my text using the tool next to Merge. Then, I increased the font size and bolded the month.
3. Use a formula to fill in the days of the week.
Next, fill in the days of the week in each column (A-G). You can do this manually but I decided to use a formula. Sheets has a function that lets you type in formulas to complete certain actions at once.
To fill in days of the week, in the cell where you want your first weekday to be, type: =TEXT(1, "DDDD"). What this tells Google is that your number will be replaced by a date or time and the format you're using is weekdays.
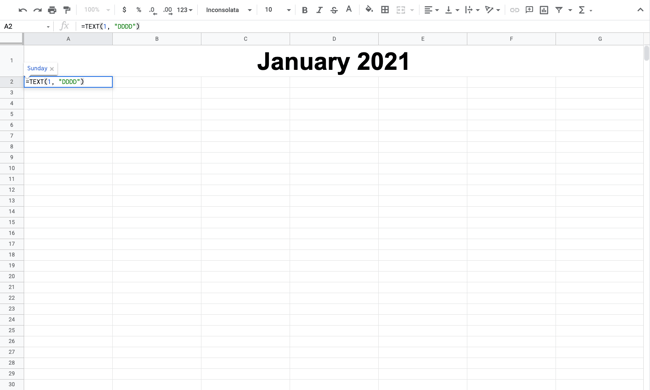
Highlight the number 1 in the formula and replace it with: COLUMN(). Then, press enter and select your first day. You're going to copy the formula in Sunday's cell by dragging the selector to the end of your row, (A-G), and pressing enter again.
Pressing enter should automatically fill in the rest of the week. Remember, if this doesn't work for you, you can always fill in the days manually.
Pressing enter should automatically fill in the rest of the week. Remember, if this doesn't work for you, you can always fill in the days manually.
4. Fill in the numbers.
Excellent! You have your days of the week. Now we're going to fill in the numerical values. Before this step, I took the time to add color to the days row and changed the font to one I liked a little more.
For the numerical values, we’ll simply identify the first day of the month and click and drag to fill in the rest.
How?
Place the number 1 on the box right underneath the first day of the month, the click and drag horizontally.
5. Fill in the rest of the numbers.
Note: In this step, I filled in the calendar numbers every other row to help with my formatting later.
Now that you’ve filled out your first row, it’s time to fill in the rest. Manually insert the next number under “Sunday,” then click and drag horizontally to fill in the rest.
Repeat the process for the next rows. You’ll insert the first number manually, the click and drag down the row. Here’s what that looks like for the next row in January.
Note: Make sure to end the month on the right number! For January, that would be the 31st.
6. Reformat your calendar if necessary.
Everything is starting to look like a calendar, right? At this stage, I reformatted things to clean up the look of my calendar a little.
Remember those extra rows in between the numbered rows? I expanded those rows to create boxes underneath the numbers. To do this, I simply dragged the rows down to make those cells bigger. 
Here are some additional formatting tips:
- Select the empty rows underneath your numbers and center them using the center text alignment tool.
- Select your entire calendar and vertically align all elements so that they’re in the center of their cells. To do this, use the vertical alignment tool.
- Bold your day numbers.
- If desired, lightly shade your numbered rows.
- If desired, gray out the Saturday and Sunday columns so that your workdays stand out.
7. Add design elements to professionalize the look.
Finally, you can add in some fun design elements to personalize the look and feel of your calendar. If it's for a client or upcoming project, you'll want to incorporate necessary launch days here.
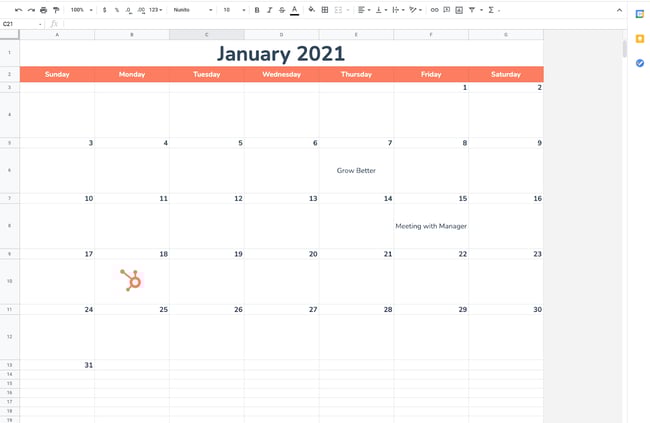
For this step, I added in a few fun images, included a few hypothetical calendar events, and played with font sizes.
8. Repeat the process from February to December.
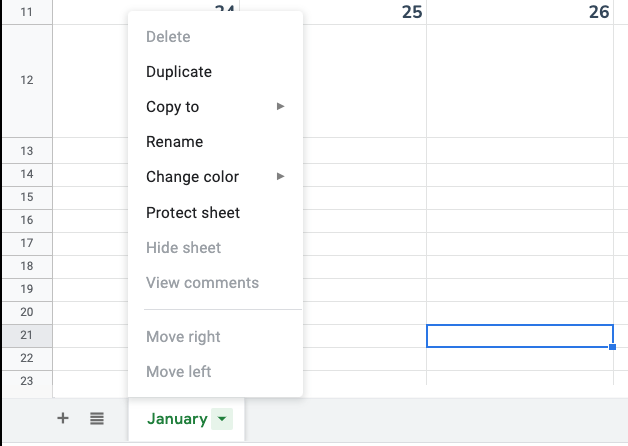
It’s time to repeat for the month of February to December. Simply duplicate your January calendar once you’ve designed it how you want it to look. To do this, right click the sheet’s tab and select Duplicate from the menu.
 To fill in the numbers, you’ll only need to know the beginning day, then click and drag to fill in the rest of the rows. Here are the first days for every month for the year 2021:
- January: Friday
- February: Monday
- March: Monday
- April: Thursday
- May: Saturday
- June: Tuesday
- July: Thursday
- August: Sunday
- September: Wednesday
- October: Friday
- November: Monday
- December: Wednesday
Next, you’ll want to know how many days you’ll need to fill in. Here are the number of days you’ll need for each month:
- January: 31
- February: 28 or 29
- March: 31
- April: 30
- May: 31
- June: 30
- July: 31
- August: 31
- September: 30
- October: 31
- November: 30
- December: 31
And then, you're done!
It's handy to use Sheets because you can open your calendar right on your browser. You can also keep track of your schedule in a place that's separate from your phone.
Alternatively, you can create important business documents such as social and editorial calendars. Below, I share a template that’s perfect for the task.
Google Sheets Calendar Template
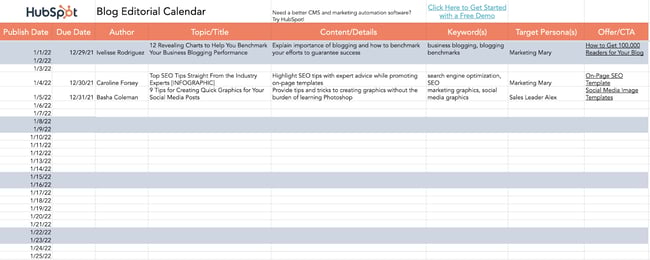
Here’s an editorial calendar template for all of your editorial planning needs. This template helps you lay out a strong editorial strategy on a daily basis.
Featured Resource: Free Editorial Calendar Templates
Use a Google Sheets Calendar to Organize Your Tasks
If you're handy with Sheets and want to give it a shot, create a Google Sheets calendar. It’s a great option if you need to create a clean calendar to track an internal marketing campaign, organize a client's upcoming projects, or share an event calendar with key stakeholders. But if you don’t want to create one from scratch, use our editorial calendar template to jumpstart your planning and organization efforts immediately.
Editor's note: This post was originally published in May 2020 and has been updated for comprehensiveness.

from Marketing https://ift.tt/3dF8ve3
via
No comments:
Post a Comment